About a month ago I saw a similar bucket on etsy.com and thought it was too cute that Chloe needed one but I just couldn't afford the forty dollar price tag. So I made my own of course. The bucket $2.50 to $5.00 at target depending on price and the lettering I cut out of regular old contact paper! There really aren't any instructions to go with this but if you have questions email me jennifer537@comcast.net.
A Busy Mom Blog
Wednesday, April 20, 2011
Monday, April 11, 2011
Step by Step Rolled Diaper Wreath Instructions
Rolled Diaper Wreath
Sorry no pics I'm doing this from work.
Step one:
Roll all your diapers. I used one whole packages of new born size diapers here it was like 40 something of them. Roll from the open end to the closed end. The trick here is to make them slightly more cone shaped when rolling them. Secure with a rubber band in the middle of each diaper.
Step Two:
Apply your ribbon. I took my ribbon rolled it around one diaper and got my measurement from there to cut each ribbon to length. Apply the glue to secure the ribbon onto the ribbon itself so as to not ruin the diaper. The point of the gift is for it to be useful as well as decorative.
Step Three:
Take your foam wreath and apply the diapers. Here is a link to where I purchased my wreath http://shop.hobbylobby.com/products/styrofoam-wreath-ring-37150/ Glue the diaper down to the wreath with hot glue the side of the diaper where your ribbon met, the ugly side. Put the glue on the ribbon not the diaper so that it is still useable. If you did not make your ribbon tight enough around your diapers the diapers will fall out of the ribbon when the wreath is lifted. Continue gluing until the wreath is full. I then added a bow and cute hanging sign I found here http://shop.hobbylobby.com/products/its-a-boy-hanging-tin-sign-413880/
hope to have pictures or a video soon!
Wednesday, January 26, 2011
Tuesday, January 25, 2011
Thursday, January 6, 2011
P is for Presley
My younger cousin Amanda is having a baby boy! I'm so excited, now our family will have a greatgrandchild of each gender. Im feeling extra crafty so the next few blogs should be about baby boy shower gifts. Her husband is in the National Gaurd so hes into everything camo. I found these really cool iron on transfers that were already camo and a blank onesie. The pics below should explain it all.


Tuesday, December 7, 2010
Artwork for Chloe's Room
I recieved this as a gift for my shower and thought it was very cute and personal.
It was given to me on regular canvas and I just added the frame to give it a stronger pressence on the white of the walls. The top left is her weight. below that is the time she was born on a broken clock face. The bottom left is her height. Second from left is just decoratrive. Below that is her foot print and then a decorative spoon. Third from the left up top is an envelope for her first haircut. Her intials are below that. The bottom contains the date she was born and everything on the far right is decorative. I am going to post up close pics below.
Friday, December 3, 2010
Owls for Christmas
I'm so in love with all the new cute Owl stuff so when I came accross this link http://moonstitches.typepad.com/moonstitches/2007/11/zakka-style-owl.html I decided to adapt the craft to paper. Using only materials I found here in my desk at work and the templates from the Moonstiches blog I made these cute owls.
I thought they would be cute stringed together as garland or even add letters to each owl to make the words Merry Christmas.
Step 1
I printed off a few different Christmas patterns onto some cardstock
Step 2
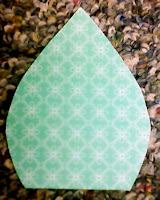
I cut out the body of the owl it's basically a leaf shape
Step 3
I cut out the design for his tummy, it's shapped like and iron
Step 4
I pasted the iron ontop of the leaf
Step 5
I folded the top of the leaf down to about half way on the iron
Step 6
I cut out eyes, ears, and feet. For the eyes small circles, and for the feet an ears triangles.
Step 7
I pasted the eyes and feet to the front of the owl and the ears to the back of the owl giving me the final project.
Subscribe to:
Posts (Atom)


