Tuesday, December 7, 2010

Artwork for Chloe's Room

I recieved this as a gift for my shower and thought it was very cute and personal.
It was given to me on regular canvas and I just added the frame to give it a stronger pressence on the white of the walls.  The top left is her weight. below that is the time she was born on a broken clock face.  The bottom left is her height.  Second from left is just decoratrive.  Below that is her foot print and then a decorative spoon.  Third from the left up top is an envelope for her first haircut.  Her intials are below that.  The bottom contains the date she was born and everything on the far right is decorative.  I am going to post up close pics below. 


Friday, December 3, 2010

Owls for Christmas

I'm so in love with all the new cute Owl stuff so when I came accross this link http://moonstitches.typepad.com/moonstitches/2007/11/zakka-style-owl.html I decided to adapt the craft to paper.  Using only materials I found here in my desk at work and the templates from the Moonstiches blog I made these cute owls.

I thought they would be cute stringed together as garland or even add letters to each owl to make the words Merry Christmas. 
Step 1
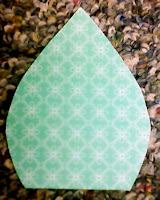
I printed off a few different Christmas patterns onto some cardstock

Step 2
I cut out the body of the owl it's basically a leaf shape

Step 3
 I cut out the design for his tummy, it's shapped like and iron
Step 4
 I pasted the iron ontop of the leaf

Step 5
I folded the top of the leaf down to about half way on the iron

Step 6
 I cut out eyes, ears, and feet.  For the eyes small circles, and for the feet an ears triangles.

Step 7
I pasted the eyes and feet to the front of the owl and the ears to the back of the owl giving me the final project.


Friday, November 12, 2010

Letters for Chloe's Room

I am recently a new mom to my beautiful baby girl Chloe Emerson Wells.  Chloe was born 8/27/2010 and when decorating her nursery I decided to do the letter name thing.  Chloe's bedding is by "My Baby Sam" in "Paisley Splash" so there weren't any pre-fab letters on the market that matched too well.  So I decided to paint them myself.  I started with white wooden letter from Hobby Lobby found here http://shop.hobbylobby.com/products/wood-letter-x-114165/ for about $2.99.  I alternated painting the letters with dutchboy interior paints in lime green an rose.
below is another image showing the different colors
After the letters dried I found a paisley design that was similar to that in the bedding through a clipart search.  I printed out the image and used an ebony pencil to trace the design.  I then layed the image on the letters and simply rubbed to transfer it on to my letters.  From here I used paint pens in various colors to trace the design.  You can find the paint pens here http://shop.hobbylobby.com/store/item.aspx?ItemId=150282 for about $4.99.  My letters began to take shape.

I repeated that process until each letter was finished. 

I think they turned out great and Chloe enjoys looking at all the bright colors in her new room.  If you guys have any questions, need help, or if your interested in having me personalize some for you just email me  jennifer537@comcast.net